
Caulking is an essential part of home maintenance that often goes unnoticed until there’s an obvious problem. Yet, this simple sealant is crucial in keeping your home energy-efficient, dry, and in good repair. Whether you’re a seasoned DIY enthusiast or a homeowner just starting to tackle home projects, understanding the basics of caulk can save you time and money, and American Exteriors is here to help.
Why Use Caulk to Seal Gaps and Cracks
Caulk primarily serves two important purposes: sealing gaps and preventing moisture damage. By filling in cracks and joints, caulk helps to keep out drafts, insects, and water. This is especially important in moisture-prone areas, as water infiltration can lead to mold growth and structural damage over time. Additionally, caulk can improve energy efficiency by preventing heat loss in colder months and keeping cool air during summer.
Where to Use Caulk Around Your Home
Caulk can be used in numerous areas around the home. Here are some common places where caulking is beneficial:
- Bathrooms: Use caulk around bathtubs, showers, and sinks to prevent water from seeping into walls and floors.
- Kitchens: Seal gaps between countertops and walls and around sinks to protect against water damage and dirt accumulation.
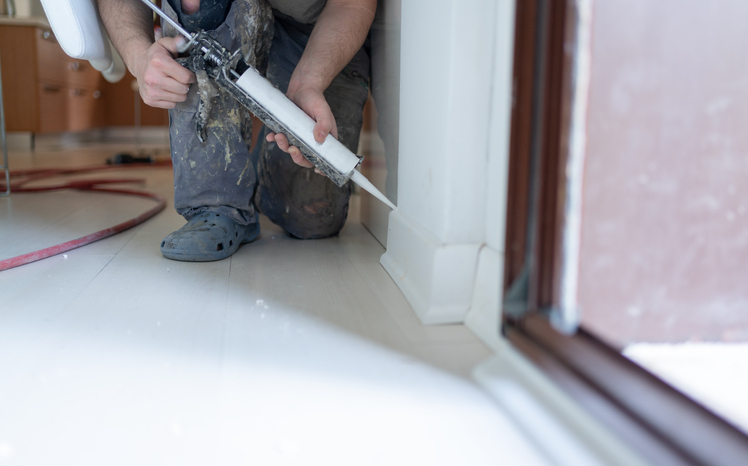
- Windows and Doors: Apply caulk to seal the edges where frames meet walls, reducing drafts and improving insulation.
- Baseboards and Crown Molding: Fill any gaps between these features and the walls to give them a polished look and prevent dust accumulation.
- Exterior: Seal around exterior windows and doors, as well as any other openings, to guard against weather and pests.
How to Apply Caulk Effectively
Applying caulk is straightforward if you follow these steps:
- Choose the Right Caulk: Use a silicone-based caulk for moist areas like bathrooms due to its water-resistant properties. Acrylic caulk is suitable for painting and filling indoor gaps.
- Prepare the Surface: Ensure the surface is clean and dry. With a scraper or utility knife, remove any old caulk and dirt or debris.
- Load the Caulk Gun: Cut the caulk tube’s tip at a 45-degree angle, making a small opening. Load the tube into the caulk gun.
- Apply the Caulk: Hold the gun at a 45-degree angle and squeeze the trigger to apply a steady bead of caulk along the gap. Move smoothly to ensure an even application.
- Smooth the Caulk: After application, use a wet finger or a caulking tool to smooth the bead. This helps adhere the caulk properly to the surfaces.
- Clean Up: Wipe any excess caulk with a damp cloth before dries.
- Let it Cure: Allow the caulk to dry for the recommended time, usually 24 hours, before exposing it to water or paint.
Masonry Work in and Around the Washington D.C. and Baltimore Metro Area
If you’re considering investing in caulk for your commercial or residential needs, be sure to consult with our expert team at American Exteriors Masonry Restoration & Waterproofing in and around the Washington, D.C., and Baltimore metro areas. We are key to ensuring that all your exterior projects run smoothly from start to finish.
Get in touch with our team today to get started!
FAQ About What Is Caulk Used For
When should you not use caulking?
You should avoid using caulk when the surfaces are wet, dirty, or dusty, as caulk needs a clean, dry surface to adhere properly. Also, using the wrong type of caulk—such as indoor latex caulk for exterior use—can cause premature cracking or failure. Caulk may not adhere well in areas with constant movement or where heavy expansion and contraction occur unless you use a flexible, specialty caulk like silicone or polyurethane.
What is the point of caulk?
The main purpose of caulk is to seal gaps and cracks to prevent air drafts, moisture infiltration, and pest entry. Caulk acts as a flexible adhesive sealant that fills joints around windows, doors, bathrooms, and other areas around the home. This sealant helps improve energy efficiency, protect against water damage, and keep your home comfortable and durable.
What needs to be caulked?
Common areas to use caulk include around bathroom fixtures, kitchen sinks, windows, doors, baseboards, crown molding, and exterior siding. You’ll want to use caulk to seal joints where two different materials meet or where gaps and cracks allow air or water to penetrate. Bathrooms and kitchens often require silicone caulk for water resistance, while paintable acrylic latex caulk is often used indoors.
Is caulking waterproof?
Silicone caulk and polyurethane caulk are waterproof sealant products, making them ideal for moisture-prone areas like bathrooms, kitchens, and exterior applications. However, not all types of caulk are fully waterproof; latex and acrylic caulks are water-resistant but may not hold up as well in constant wet conditions.
Should you paint or caulk first?
It’s best to apply caulk before painting. Using paintable caulk, such as acrylic latex caulk, allows you to seal gaps and then paint over the caulk to match your surfaces. Caulk needs time to dry and cure before painting to ensure proper adhesion and a smooth finish.
Can I apply caulk over old caulk?
Generally, you should remove old caulk before applying new caulk to ensure proper adhesion. Using a utility knife or scraper, remove the old caulk completely and clean the surface. Applying new caulk over old caulk can cause poor adhesion and cracking, especially if the old caulk is cracked or peeling.
Why use caulk instead of filler?
Caulk is a flexible sealant used to seal joints and gaps where movement, such as expansion and contraction, occurs. Fillers are typically rigid and used to fill holes or surface imperfections. Caulk adheres better and remains durable in areas like window frames and bathrooms, where flexibility and waterproofing are essential.